
Cake pops have become the go-to bite-sized dessert—fun, festive, and perfect for birthdays, baby showers, parties, or just because! These lollipop-style treats became wildly popular after bakers started rolling cake into balls, placing them on sticks, and decorating them in endless creative ways.
But here’s the truth… popular doesn’t always mean cheap.
A dozen basic cake pops can easily cost around $25, and that price can go up fast once you add custom colors, drizzle, or fancy packaging.
The good news? You can make your own for about half the cost using boxed cake mix and store-bought frosting—and you don’t need to be a professional baker to pull it off.
Why Make Cake Pops at Home?
Making cake pops yourself is:
• Budget-friendly
• Beginner-friendly
• Perfect for parties and gifts
• Customizable with flavors and toppings
What You’ll Need
• 1 box of cake mix (any flavor)
• 1 (12 oz) container of ready-made buttercream frosting
• 1 package (24 oz) almond bark or candy coating
• Cake pop sticks
• Toppings/garnish (sprinkles, Oreo crumbs, chocolate drizzle, etc.)
• Treat bags or cake pop bags + ribbon
• A styrofoam block (for drying)

Step-by-Step Instructions: How to Make Cake Pops
1. Bake the Cake
Bake your cake according to the directions on the box. Once it’s done, let it cool completely.
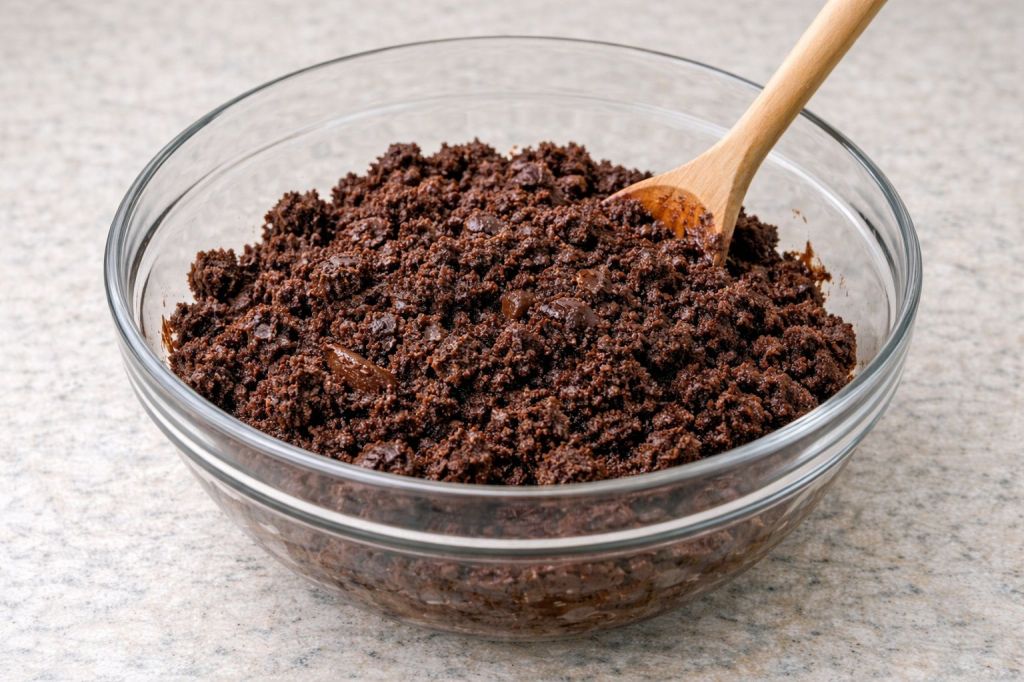
2. Crumble the Cake and Add Frosting
Once cooled, crumble your cake into a medium to large mixing bowl until it forms fine crumbs.
Add 2 tablespoons of buttercream frosting and mix well.
You’re aiming for a texture that feels like play dough—easy to roll, moist, and able to hold its shape.
If needed, keep adding frosting 1 tablespoon at a time until the mixture rolls into firm cake balls.
✅ Tip: The cake balls need to be moist, or they can crack and fall apart later.
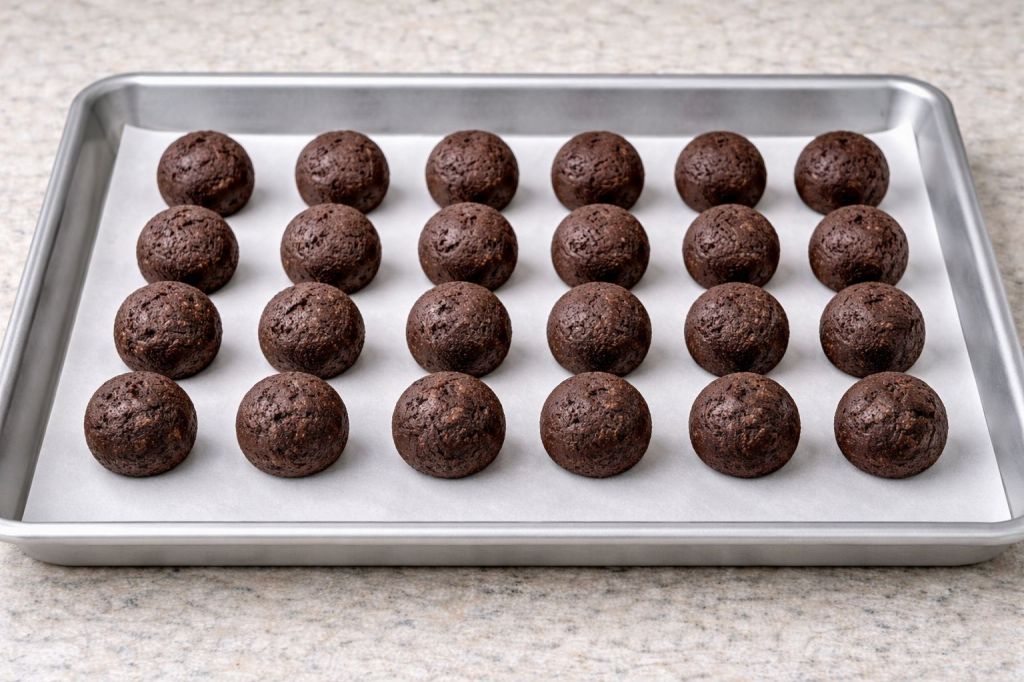
3. Roll the Cake Balls and Chill
Roll the mixture into evenly sized cake balls and place them on a baking sheet.
Put them in the freezer for 10 minutes to firm up.
While they chill, melt your candy coating in a microwave-safe bowl using 30-second intervals, stirring between each round until smooth.
4. Prepare the Sticks
Dip the tip of each cake pop stick into melted chocolate, then stick the end into a styrofoam block to dry.
Once dry, dip the stick again and insert it into the bottom of a cake ball. The chocolate works as “glue” to hold the cake pop in place.
Place the cake pops back into the freezer for a few minutes so the chocolate sets.
5. Dip and Decorate
For best results, work with 5–6 cake pops at a time so the rest stay chilled.
Dip each cake pop into the melted coating. Slowly twist and tap the stick against the side of the bowl until the coating is smooth and no longer dripping.
Add sprinkles or toppings right away, while the coating is still wet.
Place the cake pops back into the styrofoam block to dry.

6. Let Them Dry
Let the cake pops dry at room temperature for 30 minutes to 1 hour, until fully set.
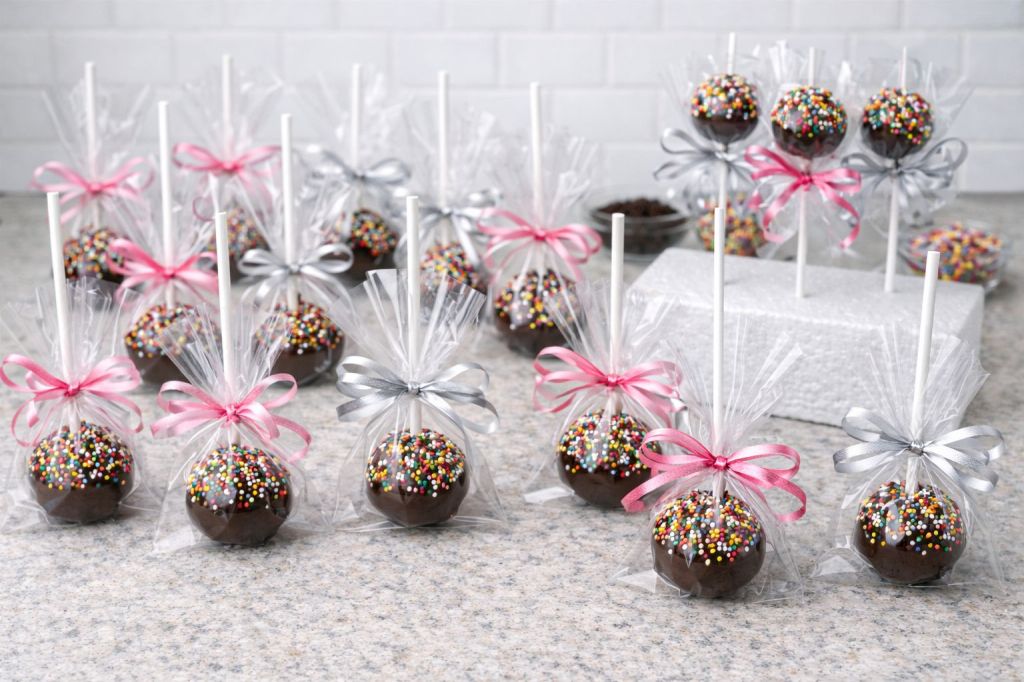
7. Package and Enjoy!
Once the coating is fully hardened, package each cake pop in a treat bag and tie with ribbon.
They’re perfect for parties, gifts, bake sales, or a fun weekend treat!
Extra Tips for Perfect Cake Pops
• If your coating seems too thick, microwave it for a few seconds longer and stir.
• If your cake balls crack, they may be too dry—add a bit more frosting next time.
• Use a cookie scoop to make your cake balls the same size.
• Sprinkles stick best when added immediately after dipping.
Final Thoughts
Cake pops are one of those treats that look fancy but can be surprisingly simple to make at home. With a few easy ingredients and a little chilling time, you can create adorable cake pops for a fraction of the cost.
If you try this recipe, let me know what flavor you made and what toppings you used!
⭐ Printable Recipe Card: Easy Homemade Cake Pops
Prep Time: 25 minutes
Cook Time: 30 minutes
Chill Time: 15 minutes
Dry Time: 30–60 minutes
Total Time: ~1 hour 40 minutes
Yield: About 24 cake pops
Skill Level: Beginner
Ingredients
- 1 box cake mix (any flavor)
- 1 (12 oz) container buttercream frosting
- 1 (24 oz) package almond bark or candy coating
- Cake pop sticks
- Sprinkles or toppings (Oreo crumbs, drizzle, crushed nuts, etc.)
- Treat bags + ribbon (optional)
Tools Needed
- Large mixing bowl
- Microwave-safe bowl
- Cake Pan
- Baking sheet
- Styrofoam block (for drying)
Instructions
- Bake the cake according to the package directions. Let cool completely.
- Crumble the cake into a large bowl until it becomes fine crumbs.
- Mix in frosting: Start with 2 tablespoons of frosting. Stir until the texture becomes moist and dough-like (similar to play dough).
- Add more frosting 1 tablespoon at a time if needed until the mixture rolls easily.
- Roll into balls: Form evenly sized cake balls and place them on a baking sheet.
- Chill: Freeze cake balls for 10 minutes.
- Melt coating: Microwave the candy coating in 30-second intervals, stirring between each round until smooth.
- Attach sticks: Dip the end of each cake pop stick into melted coating, then insert into a cake ball.
- Place back in the freezer for a few minutes to set.
- Dip and decorate: Dip each cake pop into the melted coating. Twist gently and tap to remove extra coating.
- Add sprinkles or toppings immediately.
- Dry: Stand cake pops upright in a styrofoam block and let dry at room temperature for 30–60 minutes.
- Package and enjoy! Store or gift once fully set.
Notes & Tips
- Cake balls should be moist, not dry, or they may fall apart.
- Work in small batches (about 5–6 cake pops at a time) to prevent softening.
- Add toppings right away so they stick before the coating hardens.
- Use a cookie scoop for evenly sized cake pops.


Leave a comment